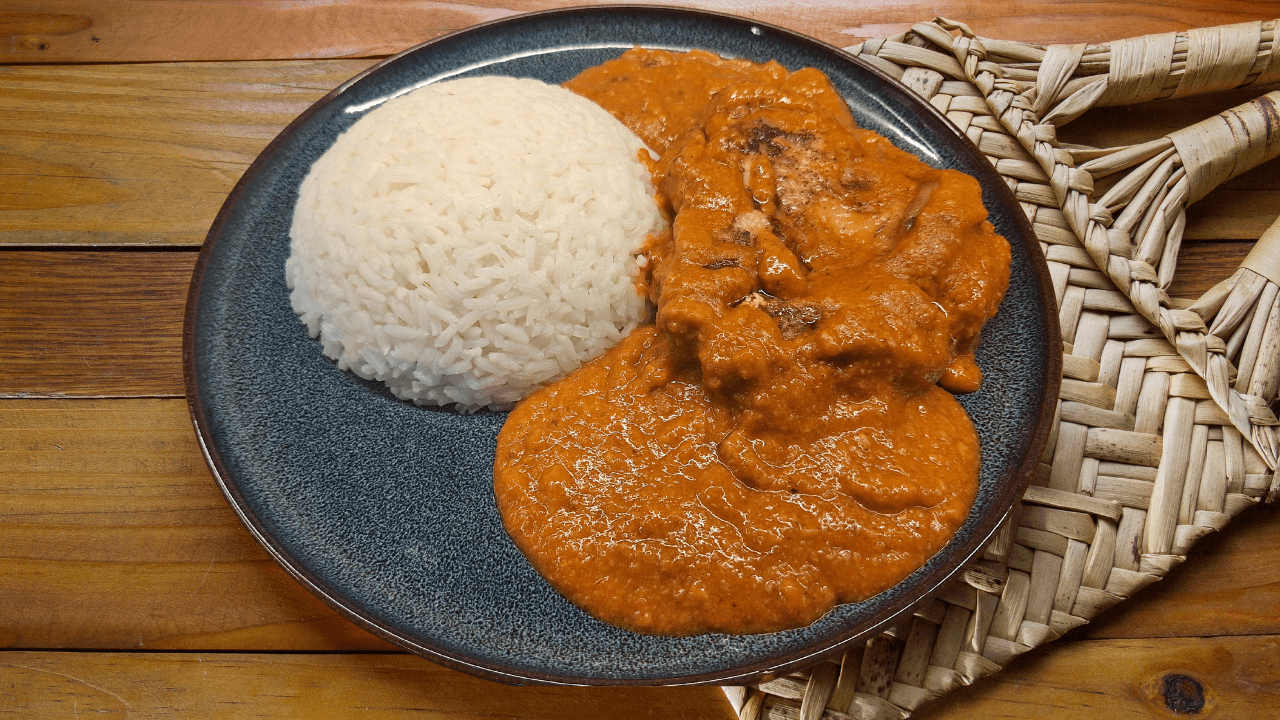
Chicken Dish

  • Pollo Encacahuatado

    Pollo Encacahuatado

    Pollo Encacahuatado is a Mexican chicken dish coated in a rich peanut and chile sauce made with tomatoes, toasted peanuts, dried ancho and chipotle chiles, bread and warm spices. Savory, nutty, and gently smoky, it is a deeply comforting dish with a sauce that is thick, complex, and full of flavor.

    What is Pollo Encacahuatado?

    Pollo Encacahuatado is a Mexican chicken dish served in a thick sauce built around peanuts and dried chiles. The name comes from cacahuate, the Spanish word for peanut, which is the defining ingredient in the sauce.

    In this version, toasted peanuts are blended with ancho and chipotle chiles, tomatoes, bread, onion and garlic. The chicken is seasoned with cinnamon and salt, seared until golden, then gently simmered in the peanut sauce with chicken broth, lime juice and red wine vinegar until tender.

    Pollo Encacahuatado in Mexican food culture

    Encacahuatado belongs to a broader Mexican tradition of richly flavored sauces made by grinding nuts or seeds with dried chiles, tomatoes, aromatics and spices. Peanuts are used in a variety of Mexican savory dishes, including peanut sauces, pipianes and moles, where they contribute body, richness and a distinctive roasted flavor.

    Pollo Encacahuatado is especially associated with home-style and celebratory cooking. Recipes vary from region to region, but chicken is one of the most common meats used, paired with a peanut-based sauce seasoned with dried chiles and spices. The finished dish is typically served with rice, tortillas or other simple accompaniments that complement the rich sauce.

    What does Pollo Encacahuatado taste like?

    Pollo Encacahuatado is rich, nutty and savory, with a gentle smoky heat from the dried ancho and chipotle chiles. Toasted peanuts give the sauce its distinctive roasted flavor and creamy body, while tomatoes, onion and garlic add depth and balance.

    The cinnamon brings a subtle warmth rather than an obvious sweetness, while lime juice and red wine vinegar brighten the sauce and keep it from feeling too heavy. The result is a deeply flavored, slightly tangy sauce that clings to the tender chicken and works especially well with rice or warm tortillas.

    How Pollo Encacahuatado varies

    Encacahuatado does not have one fixed formula. Different versions vary in the balance of peanuts, dried chiles, tomatoes, spices and other thickening ingredients, producing sauces that can range from relatively mild and nutty to darker, smokier and more intensely spiced.

    Chicken is a particularly common choice, but encacahuatado can also be prepared with other meats. The exact chile mixture also varies from recipe to recipe. This version combines ancho and chipotle chiles with toasted peanuts, tomatoes and bread, then finishes the sauce with lime juice and red wine vinegar for additional brightness.

    Where does Pollo Encacahuatado come from?

    Pollo Encacahuatado is part of a broader family of Mexican peanut-based stews and sauces rather than a dish tied to only one single place. Encacahuatado is especially appreciated in central and southern parts of Mexico, including Oaxaca, Puebla, Tlaxcala, Mexico City and Veracruz, where versions with chicken or pork are prepared with peanuts, dried chiles and spices.

    Regional styles differ in both texture and seasoning. In Oaxaca, chicken versions are common, while in central Veracruz encacahuatado is also strongly associated with pork and festive cooking. Some Veracruz recipes include ingredients such as cinnamon, bread, vinegar and even wine, showing how the sauce has developed differently from one regional tradition to another.

    Make Pollo Encacahuatado at home

    Ready to make it yourself? Follow the full Pollo Encacahuatado recipe with ingredients, step-by-step instructions, recipe notes and video.
  • Butter Chicken

    Butter Chicken

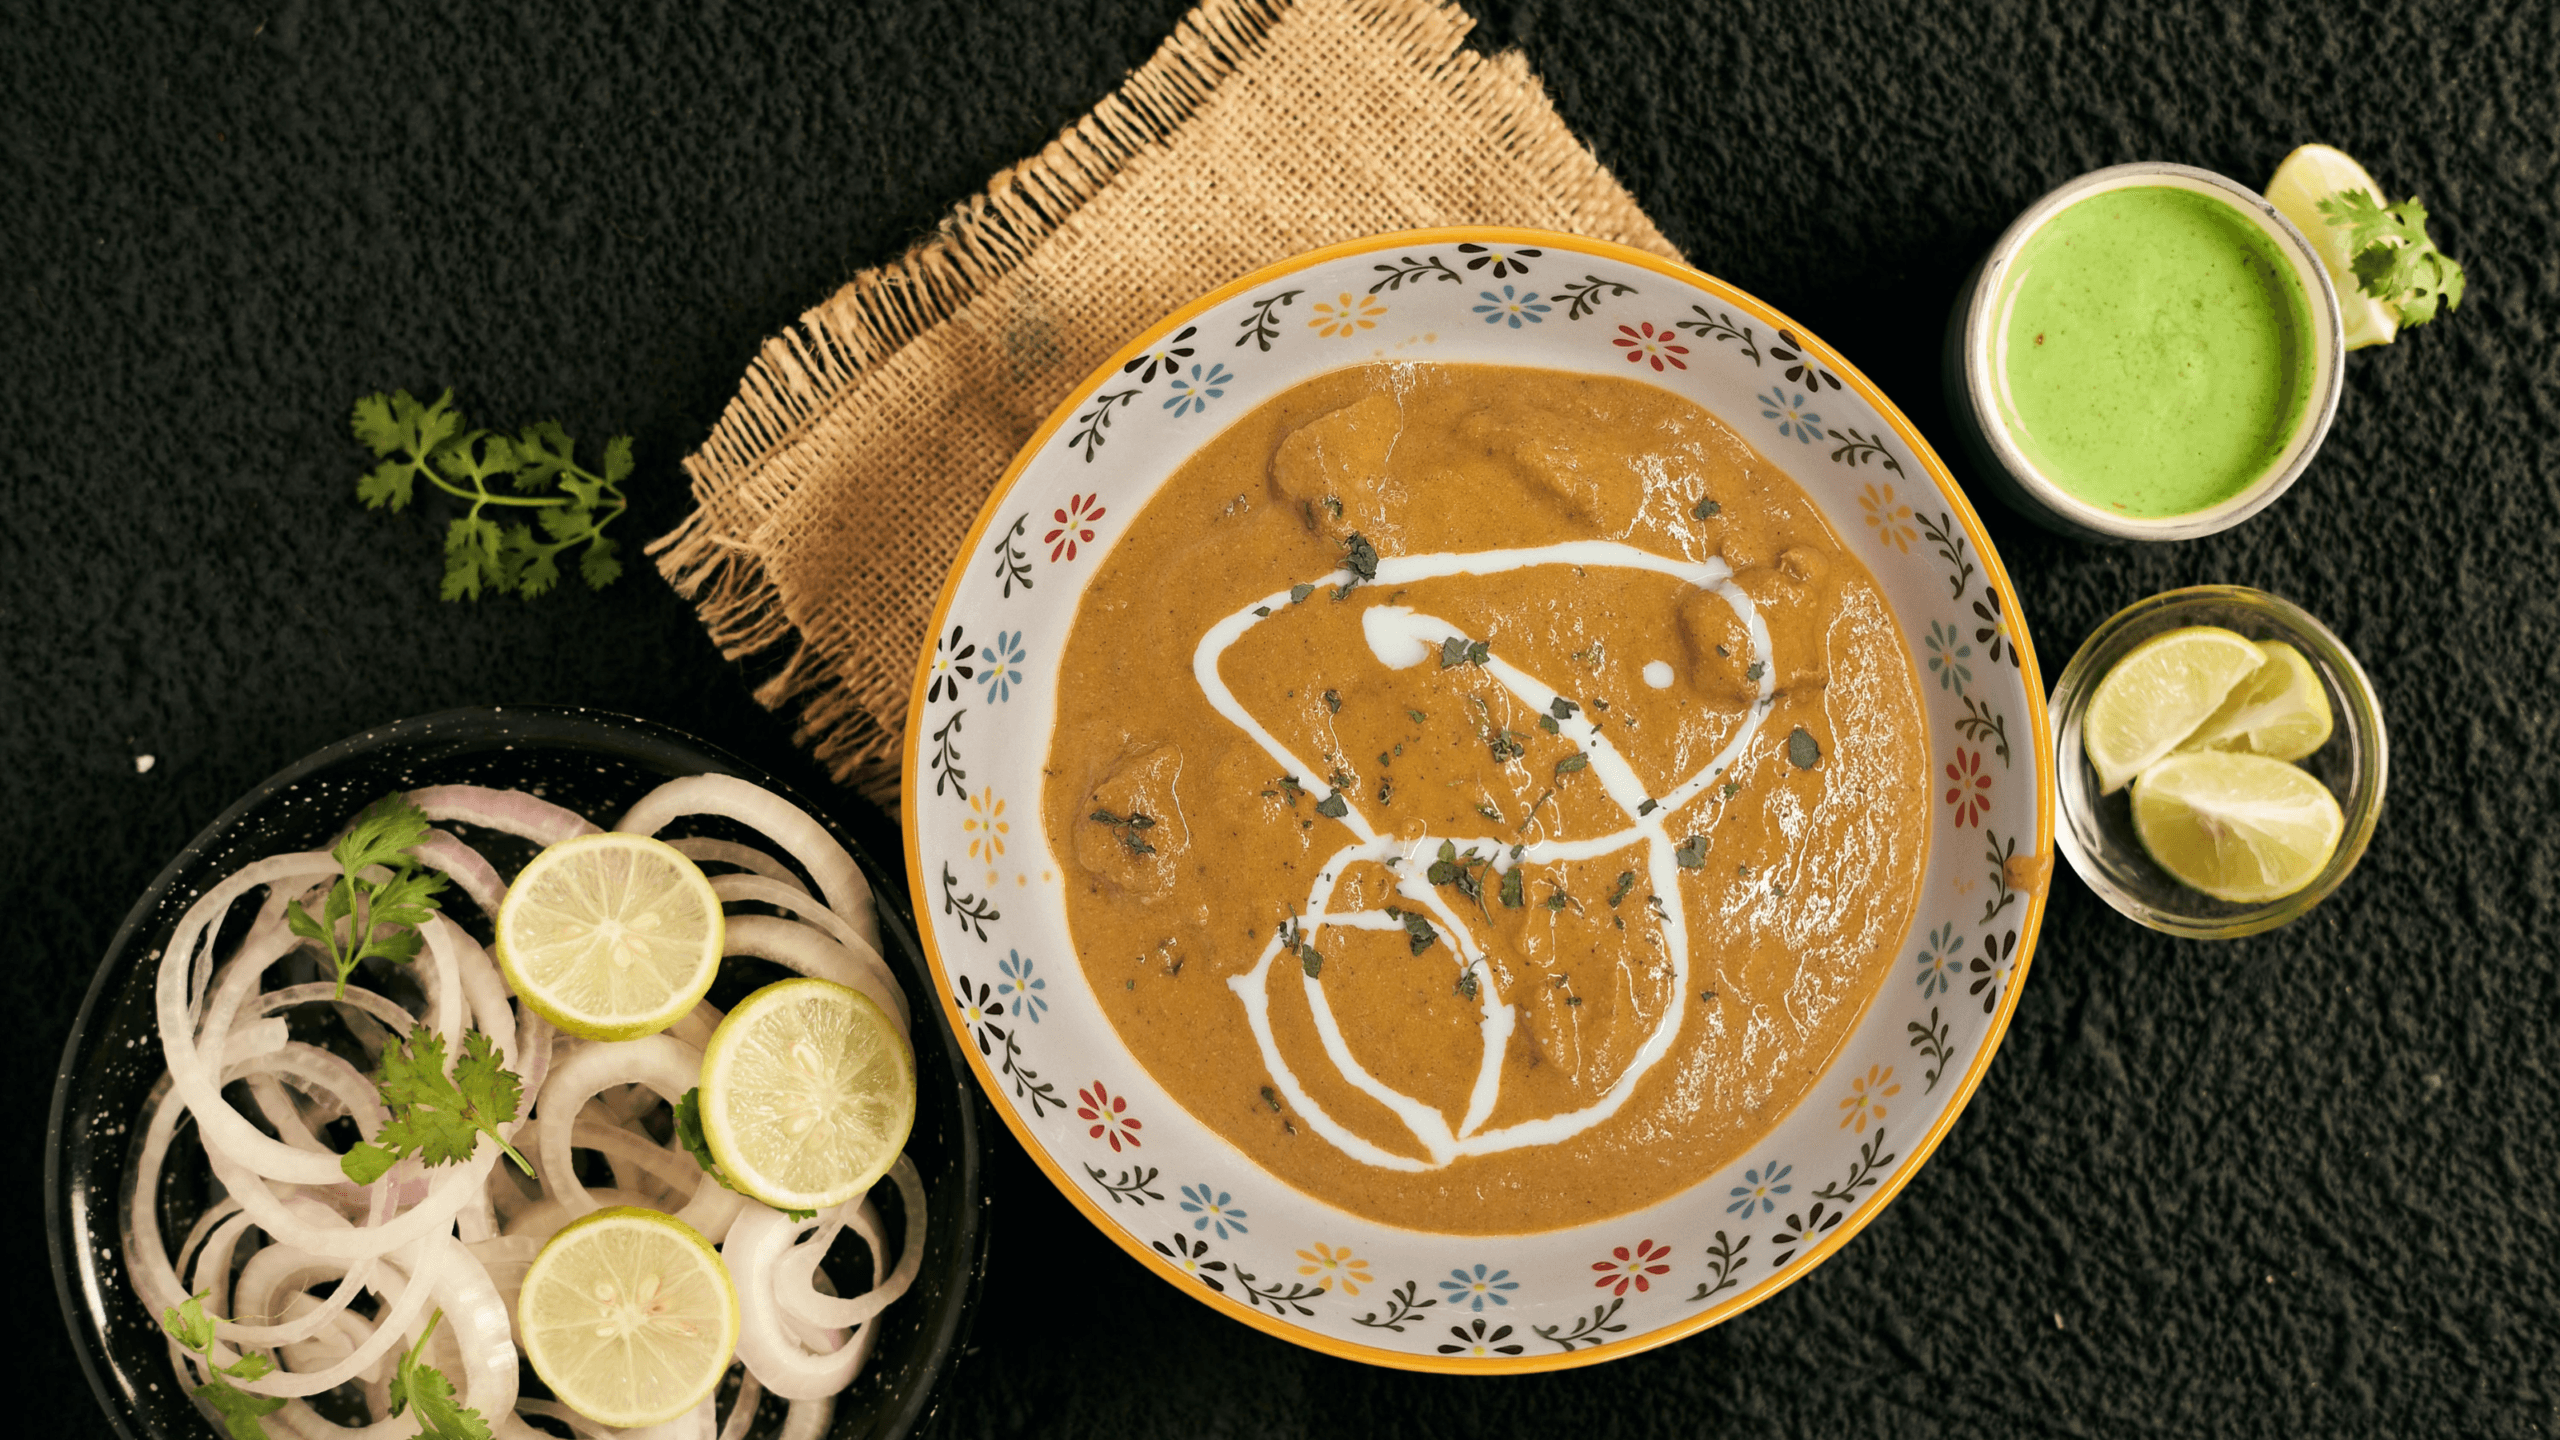
    Butter Chicken, also known as Murgh Makhani, is an Indian chicken dish with a rich tomato-based sauce flavored with butter, cream, garam masala and aromatic spices. The chicken is marinated in yogurt and spices, lightly browned, then finished in the smooth sauce until tender.

    What is Butter Chicken?

    Butter Chicken, or Murgh Makhani, is a North Indian chicken dish made with marinated chicken and a rich tomato-based sauce. The sauce is typically flavored with butter, cream and warm spices, giving the dish its smooth texture and deep savory flavor.

    In this version, the chicken is marinated in yogurt, lemon juice and spices before being browned, while the sauce is made with tomatoes, onion, cashews, ginger-garlic paste, garam masala and kasuri methi. The sauce is blended until smooth, then finished with butter and cream before the chicken is simmered in it until cooked through.

    Butter Chicken in Indian food culture

    Butter Chicken is one of the best-known dishes associated with North Indian restaurant cooking. Its combination of spiced chicken and a rich, mildly tangy tomato-butter sauce has made it especially popular in restaurants, where it is commonly served with naan, roti or rice.

    Although the dish is rich and creamy, its flavor depends on more than butter and cream. Garam masala, ginger, garlic and dried fenugreek leaves help give the sauce its characteristic aroma, while the tomato base provides acidity and balance.

    What does Butter Chicken taste like?

    Butter Chicken is rich, creamy and mildly tangy, with tomatoes providing acidity and butter and cream giving the sauce a smooth, luxurious texture. Garam masala, ginger and garlic add warmth and depth without making the dish overwhelmingly spicy.

    The marinated chicken brings its own savory, spiced flavor, while cashews help give the sauce extra body and softness. Kasuri methi adds a distinctive slightly bitter, aromatic note that balances the richness of the sauce.

    How Butter Chicken varies

    Butter Chicken varies from cook to cook in richness, sweetness and spice level. Some versions use more cream or butter for a milder, richer sauce, while others lean more heavily on tomatoes and spices for a sharper flavor.

    The chicken can be cooked in different ways before being added to the sauce, including grilling, roasting or pan-frying. Some recipes also adjust the amount of cashews, sugar or kasuri methi, which changes the body and aroma of the finished dish.

    Where does Butter Chicken come from?

    Butter Chicken is widely associated with Delhi, India, where it emerged in the mid-20th century from the North Indian restaurant tradition. It is closely linked with cooks who used leftover tandoori chicken in a tomato-based sauce enriched with butter and cream, creating a dish that kept the chicken moist while adding richness and flavor.

    The dish became increasingly popular in restaurants across India and later around the world. Today, Butter Chicken is one of the most internationally recognizable dishes associated with North Indian cuisine, although recipes vary considerably in sweetness, richness and spice.

    Make Butter Chicken at home

    Ready to make it yourself? Follow the full Butter Chicken recipe with ingredients, step-by-step instructions, recipe notes and video.
  • Homemade Ramen

    Homemade Ramen

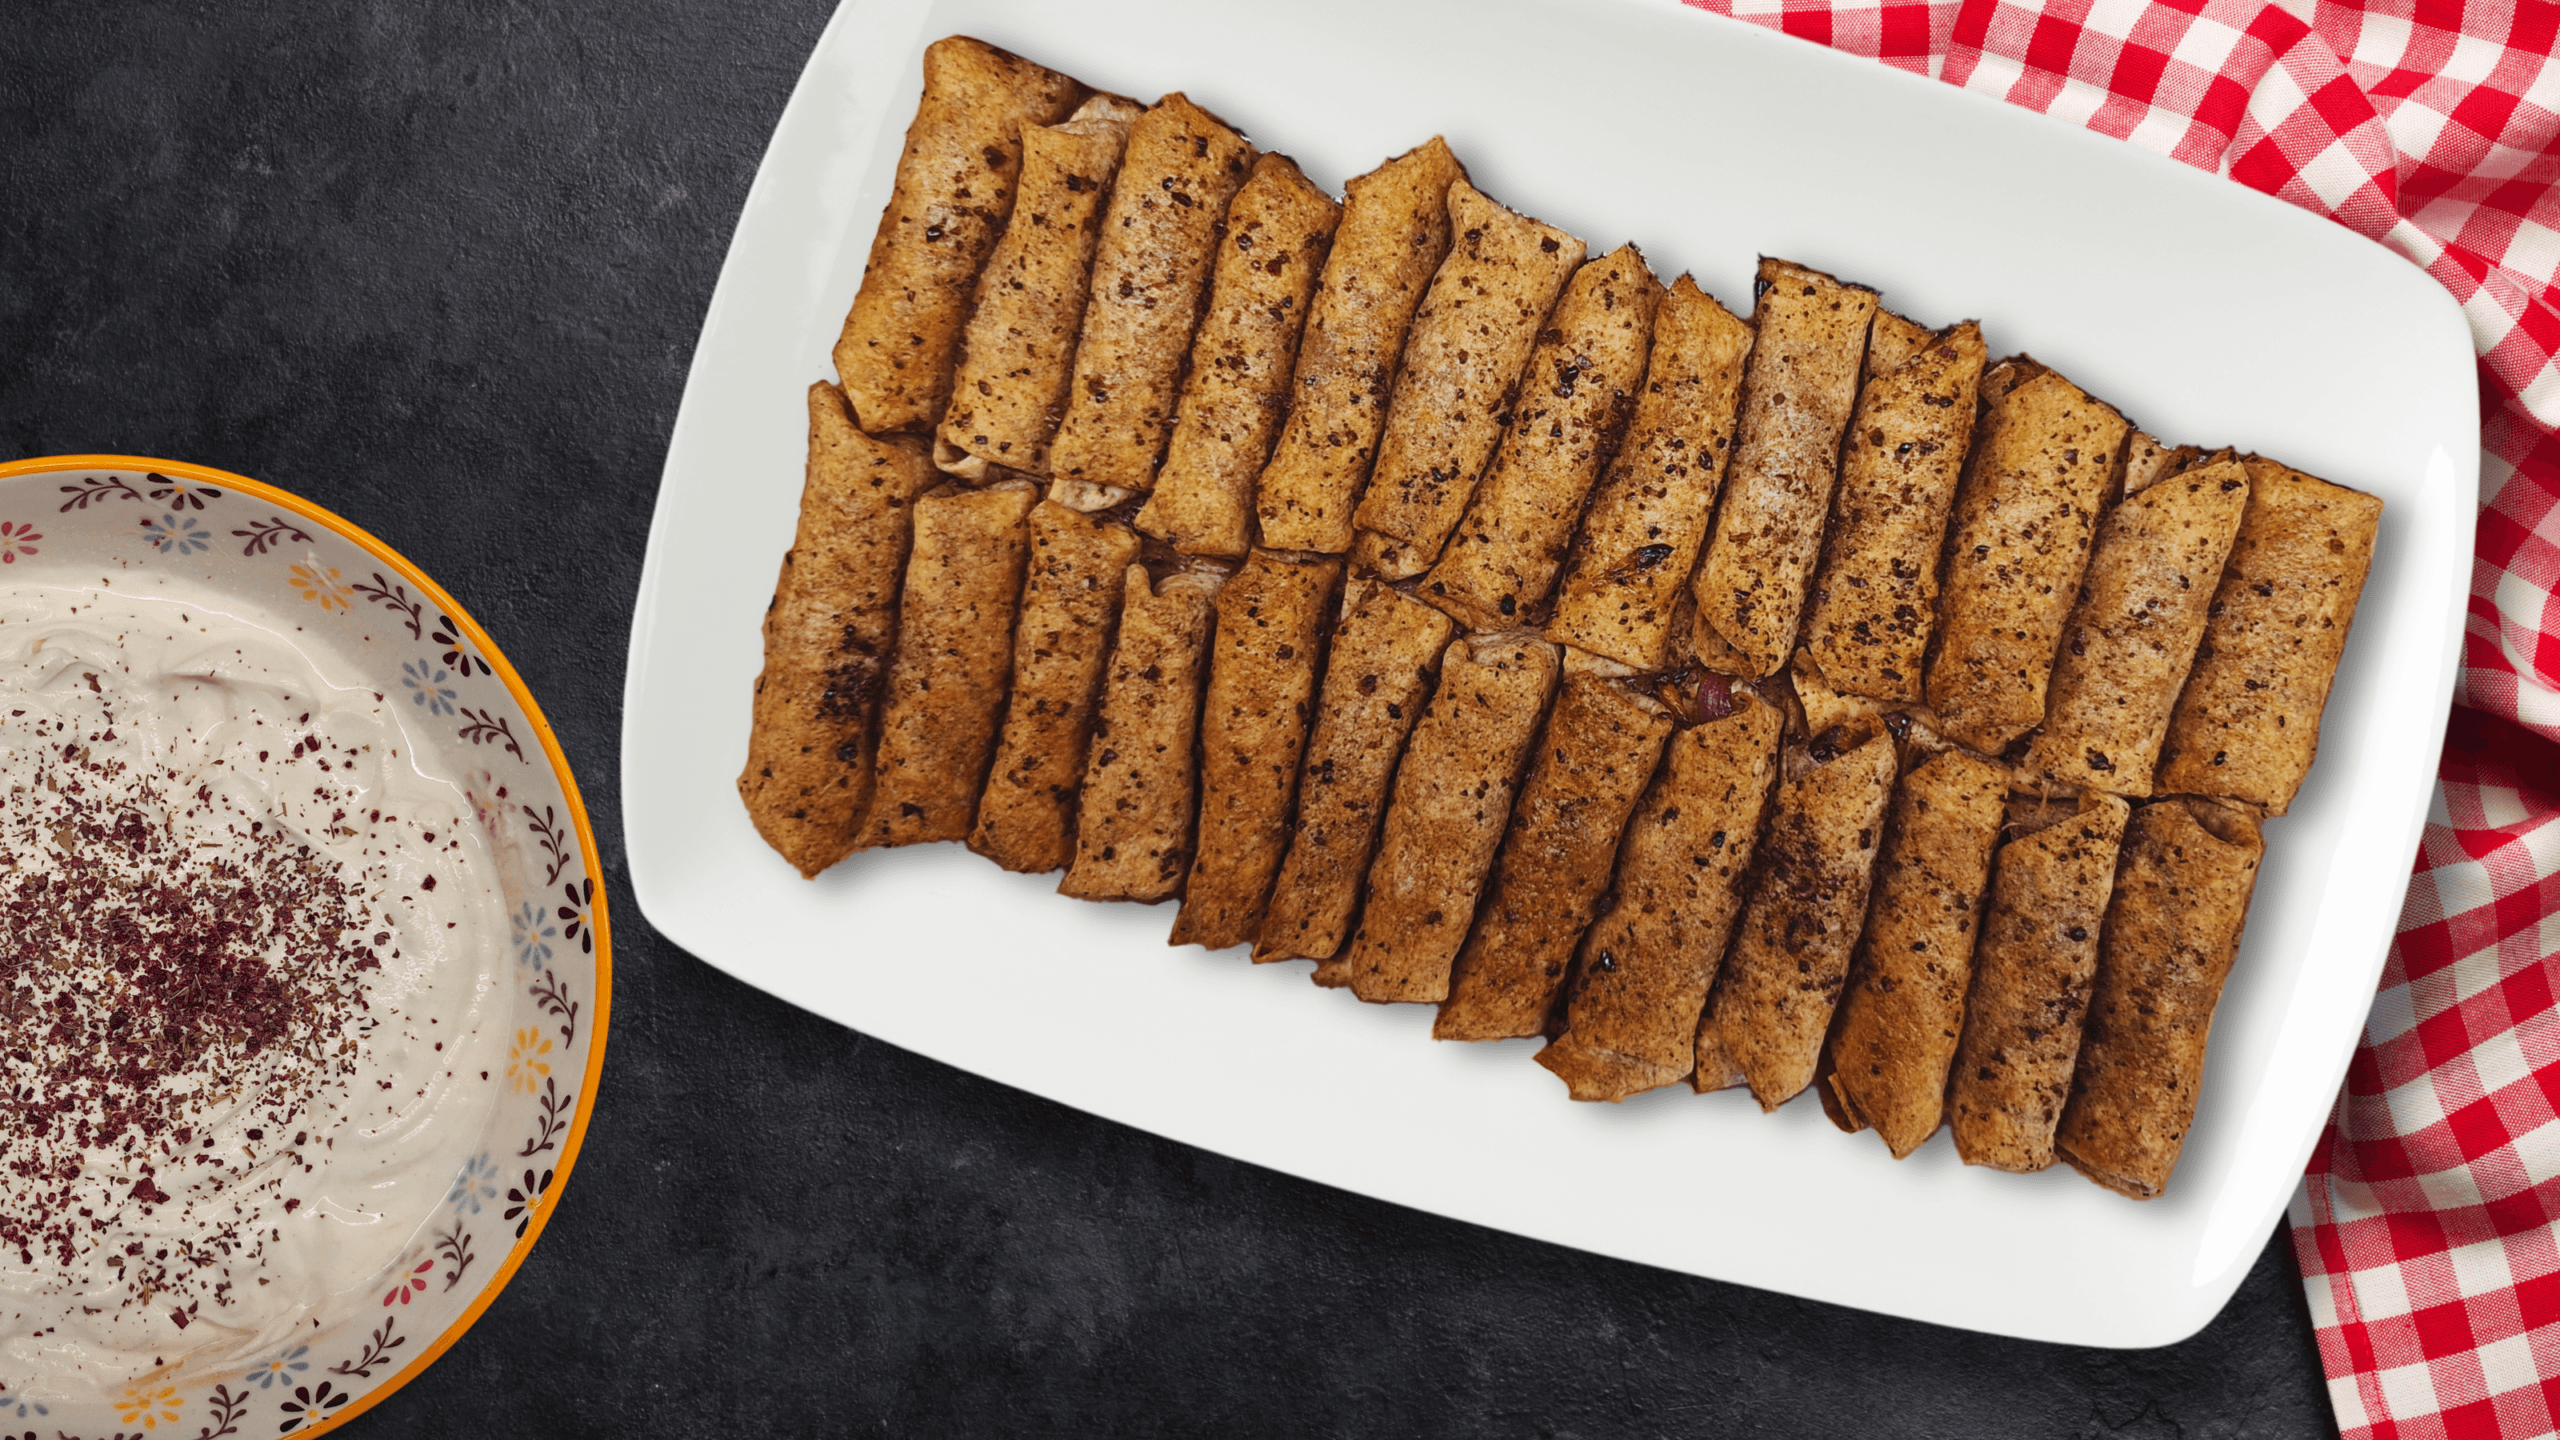
    Homemade Ramen is a Japanese noodle soup built around a deeply flavored broth, springy noodles, and a variety of toppings. This version combines chicken stock and dashi with soy sauce, then adds sliced chicken, shiitake mushrooms, soft-boiled eggs, baby spinach, green onions, nori, and crispy garlic.

    What is Homemade Ramen?

    Homemade Ramen is a Japanese noodle soup made by combining a flavorful broth with ramen noodles and a variety of toppings. In this version, the broth is built from both chicken stock and dashi, then seasoned with soy sauce, rice vinegar, sugar, and salt.

    The bowl is finished with sliced chicken, shiitake mushrooms, soft-boiled eggs, baby spinach, green onions, fried garlic, nori, sesame seeds, and optional chili oil. The result is a layered soup with savory depth from the chicken and dashi, balanced by fresh and aromatic toppings.

    Homemade Ramen in Japanese food culture

    Ramen is one of Japan’s most recognizable comfort foods, with countless regional styles built around different broths, seasonings, noodles, and toppings. It is commonly served in dedicated ramen shops, where each bowl is often defined by the character of its broth and the way it is seasoned.

    Making ramen at home usually means breaking the dish into separate components: broth, seasoning, noodles, protein, and toppings. This version follows that approach by combining homemade chicken stock with dashi, then finishing the bowl with chicken, eggs, mushrooms, greens, and aromatic garnishes.

    What does Homemade Ramen taste like?

    Homemade Ramen is deeply savory and aromatic, with the chicken stock providing body and richness while the dashi adds a lighter layer of umami from kombu and bonito. Soy sauce brings saltiness and depth, while a small amount of rice vinegar and sugar helps round out the broth.

    The toppings add contrast: tender chicken, earthy shiitake mushrooms, creamy soft-boiled eggs, fresh baby spinach, crisp green onions, nori, sesame seeds, and fried garlic. Optional chili oil adds heat and another layer of richness.

    How Homemade Ramen varies

    Ramen varies widely depending on the broth, seasoning, noodles, and toppings. Common styles include soy sauce-based shoyu ramen, miso ramen, salt-seasoned shio ramen, and rich tonkotsu ramen made with pork bones.

    Homemade versions can also be adapted with different proteins, vegetables, mushrooms, eggs, and garnishes. This version combines chicken stock with dashi and soy sauce, then uses chicken, shiitake mushrooms, baby spinach, soft-boiled eggs, nori, green onions, and fried garlic as the main toppings.

    Where does Homemade Ramen come from?

    Ramen developed in Japan from Chinese-style wheat noodle soups that became increasingly popular in the late 19th and early 20th centuries. Over time, Japanese cooks adapted the dish with local broths, seasonings, noodles, and toppings, creating the many regional styles associated with ramen today.

    As ramen spread across Japan, different areas developed their own characteristic versions, ranging from light soy-based broths to rich pork-bone soups. Homemade ramen follows the same basic idea of combining noodles, a seasoned broth, and carefully chosen toppings, while allowing the cook to adapt each component to taste.

    Make Homemade Ramen at home

    Ready to make it yourself? Follow the full Homemade Ramen recipe with ingredients, step-by-step instructions, recipe notes and video.

  • Musakhan Rolls

    Musakhan Rolls

    These Musakhan rolls wrap the flavors of the classic Palestinian dish into crisp, individual portions filled with shredded chicken, slow-cooked red onions, olive oil and plenty of sumac. Saj bread is the traditional choice for this style, but flour tortillas make a practical substitute, and the finished rolls are served hot with a creamy yogurt-tahini sauce.

    Watch how to make Musakhan Rolls

    Ingredients

    For the chicken

    • 1.5 kg (about 3.3 lb) chicken legs
    • Hot water, enough to cover the chicken
    • 1 cinnamon stick
    • 1 medium onion, roughly chopped, about 150 g (5 oz)
    • 4 cardamom pods
    • 2 bay leaves

    For the filling

    • 750 g (about 1.65 lb) red onions, thinly sliced
    • 180 ml (3/4 cup) olive oil
    • Cooked shredded chicken, from above
    • 4 tbsp sumac, plus more for finishing
    • 1 tbsp salt, about 18 g, or to taste
    • 1/2 tsp black pepper
    • 1 tsp Middle Eastern 7-spice blend

    For the yogurt-tahini sauce

    • 10 large flour tortillas, cut into 4 wedges (or 8 wedges if extra-large), or saj bread as needed
    • Extra oil from the chicken and onion filling, for brushing
    • Extra sumac, for sprinkling
    • Fresh parsley, chopped, for garnish

    For assembling

    • 480 g (2 cups) Greek Yogurt
    • 45 g (3 tbsp) tahini
    • 30 ml
    • (2 tbsp) fresh lemon juice
    • 2 garlic cloves, minced or grated
    • Salt, to taste
    • Sumac, for garnish

    Instructions

    Cook the chicken

    Place the chicken legs in a large pot and cover them with hot water. Add the cinnamon stick, roughly chopped onion, cardamom pods and bay leaves.

    Bring to a boil, then reduce the heat and skim off any foam that rises to the surface. Simmer for about 40 to 45 minutes, or until the chicken is very tender and easy to shred.

    Remove the chicken from the pot and set it aside until cool enough to handle. Strain and reserve the stock for another recipe if you like.

    Cook the onions

    While the chicken is cooking, add the sliced red onions and olive oil to large pan over medium heat.

    Cook slowly, stirring occasionally, for about 25 to 35 minutes, until the onions are soft, sweet and deeply softened. They do not need to become dark brown, but they should be tender and lightly caramelized.

    Make the filling

    Remove the skin and bones from the cooked chicken, then shred the meat using your hands or two forks.

    Add the shredded chicken to the pan with the onions and olive oil. Season with the sumac, salt, black pepper and 7-spice blend. Stir until the chicken is evenly coated with the onions, oil and spices.

    Taste and adjust the seasoning if needed. The filling should be savory, tangy from the sumac and rich from the olive oil. Remove from the heat and let it cool slightly before assembling the rolls.

    Assemble the rolls

    Preheat the oven to 180°C / 350°F and lightly oil a baking tray to prevent sticking.

    If using saj bread, cut it into pieces large enough to roll. If using flour tortillas, cut each tortilla into 4 wedges; if the tortillas are extra-large, cut each into 8 wedges.

    Place each roll seam-side down on the prepared baking tray so it does not open during baking.

    Bake the rolls

    Brush the tops of the rolls with some of the flavorful oil from the chicken and onion filling, then sprinkle with extra sumac.

    Bake for about 15 to 25 minutes, or until the rolls are golden and crisp. The exact baking time will depend on the type and thickness of the bread.

    Make the yogurt-tahini sauce

    While the rolls are baking, combine the Greek yogurt, tahini, lemon juice, garlic and salt in a bowl and mix until smooth. Taste and adjust with more lemon juice, salt or garlic if needed, then sprinkle a little sumac on top.

    Serve

    Remove the Musakhan rolls from the oven, garnish with chopped parsley and serve hot with the yogurt-tahini sauce on the side.

    Recipe notes

    Saj bread or flour tortillas

    Saj bread is the better option if you can find it, but flour tortillas work well as an accessible substitute. Adjust the size of the pieces as needed so the rolls are easy to fill and fold.

    Don’t skimp on the olive oil

    Olive oil is a major part of the flavor of Musakhan, so this is not a recipe where you want to reduce it too much. It helps flavor both the onions and the bread.

    If the filling seems very oily

    Use some of the excess flavored oil from the chicken and onion mixture to brush the rolls before baking, and leave the rest behind rather than adding all of it to the rolls.

    Other cuts of chicken

    Chicken breasts or boneless chicken thighs can be used instead of chicken legs. Adjust the cooking time as needed and cook the chicken only until tender enough to shred.

    Learn more about Musakhan

    Want to know more about the dish itself? Explore the origins, food culture, and story behind Musakhan.

  • Pollo Encacahuatado

    Pollo Encacahuatado

    This Pollo Encacahuatado recipe features tender chicken thighs simmered in a rich Mexican peanut sauce made with toasted peanuts, ancho and chipotle chiles, tomatoes, bread and warm spices. The chicken is seared first, then gently cooked in the sauce until tender, while lime juice and red wine vinegar add brightness to balance the deep, nutty flavors.

    Watch how to make Pollo Encacahuatado

    Ingredients

    For the chicken and broth

    • 4 boneless chicken thighs, with bones reserved for the broth, about 700–900 g (1 1/2–2 lb) total before deboning
    • Bones from the chicken thighs
    • 960 ml (4 cups) water
    • 1 small onion, roughly chopped, about 100 g (3 1/2 oz)
    • 1 garlic clove
    • 1 bay leaf
    • 6 cardamom pods
    • Salt, to taste

    For the peanut sauce

    • 2 dried ancho chiles, stemmed and seeded
    • 2 dried chipotle chiles, stemmed if needed
    • 120 g (1 cup / about 4 oz) raw peanuts, shelled and skinned
    • 2 large tomatoes, roughly chopped, about 450–500 g (1–1.1 lb)
    • 1 small crusty bread roll, cut into pieces, about 50–70 g (2–2 1/2 oz). Use a bolillo, papo seco, small baguette piece, or any plain crusty white roll.
    • 1 small onion, roughly chopped, about 100 g (3 1/2 oz)
    • 2 garlic cloves, roughly chopped
    • 1 tsp sugar, about 4 g
    • 1 tsp cinnamon
    • 1 tsp kosher salt, or to taste
    • 80 ml (1/3 cup) vegetable oil
    • 480 ml (2 cups) chicken stock or low-sodium broth
    • 2 tsp lime juice
    • 2 tbsp (30 ml) red wine vinegar

    Instructions

    Make the chicken broth

    Place the reserved chicken bones in a pot and add the water. Set over medium heat and bring to a gentle simmer, skimming off any foam that rises to the surface.

    Add the chopped onion, garlic clove, bay leaf, cardamom pods and a little salt. Simmer gently for about 30 minutes.

    Remove the chicken bones, then strain the broth and set it aside for the sauce.

    Soften the chiles and toast the peanuts

    While the broth is simmering, soak the dried ancho and chipotle chiles in boiling water for about 15 minutes, or until softened. Drain and set aside.

    Toast the peanuts in a dry pan over low to medium-low heat, stirring constantly, until golden and fragrant, about 10–15 minutes. Transfer to a plate and let cool slightly.

    Blend the peanut sauce

    Add the softened chiles, toasted peanuts, tomatoes, bread, onion, garlic and sugar to a blender.

    Blend until smooth. If the mixture is too thick for your blender, add a small splash of the reserved chicken broth. Blend for several minutes for a very smooth sauce, or more briefly for a rustic texture.

    Season and sear the chicken

    Mix the cinnamon and kosher salt together, then sprinkle evenly over the chicken thighs.

    Heat the vegetable oil in a large deep skillet or wide pan over medium-high heat. Add the chicken thighs and sear until golden on both sides, about 5–6 minutes per side. Transfer the chicken to a plate.

    Pour off most of the oil, leaving about 2 tablespoons in the pan.

    Cook the peanut sauce

    Add the blended peanut sauce to the same pan. Cook over medium heat, stirring often, until very thick and slightly deeper in color, about 10–15 minutes.

    Add the chicken stock or reserved broth, lime juice and red wine vinegar. Stir well and bring the sauce to a gentle simmer.

    Simmer the chicken and finish

    Return the chicken thighs to the pan, nestling them into the sauce. Reduce the heat to medium-low and simmer gently for about 20–25 minutes, turning the chicken occasionally, until fully cooked and tender.

    If the sauce becomes too thick, add a little more chicken broth. If it is too thin, simmer uncovered for a few more minutes until it reaches the consistency you prefer.

    Taste and adjust with additional salt, vinegar or a small pinch of sugar if needed.

    Serve hot with rice, warm tortillas, or both.

    Recipe Notes

    Bread for thickening

    The bread helps thicken the peanut sauce and give it body. Use any plain crusty white roll, such as a bolillo, papo seco or a piece of baguette.

    Using leftover cooked chicken

    If using leftover cooked chicken, skip the searing step and simmer the chicken gently in the finished sauce until heated through. In that case, prepared chicken stock or bouillon can replace the homemade broth.

    Toast the peanuts carefully

    Toast the peanuts slowly over low to medium-low heat and stir constantly. They can burn quickly, and burnt peanuts may make the sauce bitter.

    Adjust the sauce texture

    For a smoother sauce, blend for several minutes. For a more rustic texture, blend more briefly.

    Control the thickness

    The sauce will continue to thicken as it simmers. Add a little more broth if you prefer a looser consistency.

    Learn more about Pollo Encacahuatado

    Want to know more about the dish itself? Explore the history, food culture, regional variations and story behind Pollo Encacahuatado.

  • Butter Chicken

    Butter Chicken

    This Butter Chicken recipe combines yogurt-marinated chicken with a smooth tomato, cashew, butter and cream sauce flavored with garam masala, ginger, garlic and kasuri methi. The chicken is lightly browned first, then simmered gently in the sauce until tender and rich.

    Watch how to make Butter Chicken

    Ingredients

    For the chicken

    • 500 g boneless chicken thighs, cut into bite-sized pieces
    • 1½ tbsp ginger-garlic paste, or 1 tbsp minced garlic plus ½ tbsp grated ginger
    • ½ cup Greek yogurt or plain yogurt
    • 1 tbsp lemon juice
    • ½ tbsp paprika
    • ¼ tsp cayenne pepper
    • ½ tsp turmeric
    • 1 tsp garam masala
    • Salt, to taste
    • 1 tbsp oil, for pan-frying

    For the gravy

    • 500 g canned crushed tomatoes
    • 1 onion, roughly chopped
    • 50 g cashews
    • 1½ tbsp ginger-garlic paste, or 1 tbsp minced garlic plus ½ tbsp grated ginger
    • 1 tsp kasuri methi, optional but recommended
    • 1 tsp garam masala
    • 1 tbsp sugar
    • ½ tsp paprika
    • ¼ tsp cayenne pepper
    • 3 tbsp butter, divided
    • 50 ml cream, plus a little extra to finish
    • Salt, to taste

    Instructions

    Marinate the chicken

    In a bowl, combine the chicken with the ginger-garlic paste, yogurt, lemon juice, paprika, cayenne pepper, turmeric, garam masala, and salt.

    Cover and refrigerate for at least 1 hour, or preferably overnight and up to 24 hours.

    Brown the chicken

    Heat the oil in a large frying pan over high heat.

    Remove the chicken from the marinade, keeping the marinade that clings to the pieces. Do not pour the leftover marinade into the pan.

    Add the chicken and cook for about 3 minutes, until lightly browned on the outside but not fully cooked through.

    Work in batches if needed to avoid overcrowding the pan.

    Remove the chicken and set aside.

    Start the gravy

    In the same pan, add the onion and 1 tablespoon of the butter.

    Cook until the onion has softened.

    Reduce the heat, then add the ginger-garlic paste, paprika, and cayenne pepper.

    Cook for about 1 minute, stirring constantly.

    Cook the tomato and cashew base

    Add the crushed tomatoes and cashews.

    Cook over medium heat for 15 to 20 minutes, stirring occasionally, until the onion and cashews are soft and the sauce has thickened slightly.

    Add the salt, sugar, garam masala, paprika, and cayenne pepper.

    Cook for another 2 minutes.

    Blend the sauce

    Let the mixture cool slightly, then transfer it to a blender with ½ cup water.

    Blend until very smooth, adding a little more water only if needed.

    For an extra-silky sauce, strain it back into the same pan.

    Finish the Butter Chicken

    Add the remaining 2 tablespoons butter, the cream, the chicken, and the kasuri methi if using.

    Simmer gently for 5 to 7 minutes, until the chicken is cooked through and the sauce is rich and smooth.

    Finish with a little extra cream and, if you like, a small pinch of kasuri methi.

    Recipe Notes

    Marinate for more flavor

    A minimum of 1 hour works, but marinating the chicken overnight gives the yogurt and spices more time to penetrate the meat. You can marinate it for up to 24 hours.

    Do not overcrowd the pan

    Brown the chicken in batches if necessary. Overcrowding lowers the pan temperature and causes the chicken to steam instead of developing color.

    Use the marinade clinging to the chicken

    There is no need to wipe the chicken clean before cooking. Keep the marinade coating each piece, but do not pour the leftover marinade from the bowl into the pan.

    Blend the sauce until very smooth

    The cashews help thicken and enrich the gravy. Blend thoroughly for the smoothest texture, and strain the sauce after blending if you want an especially silky finish.

    Add water only as needed

    Start with the ½ cup of water when blending the sauce. Add more only if the mixture is too thick to blend easily, since too much water can make the finished sauce thin.

    Kasuri methi is optional but recommended

    Dried fenugreek leaves add a distinctive aroma that is strongly associated with Butter Chicken. Crush them lightly between your fingers before adding them to help release their flavor.

    Learn more about Butter Chicken

    Want to learn more about the dish, its flavors, variations and place in Indian food culture? Read our guide to Butter Chicken.

  • Homemade Ramen

    Homemade Ramen

    This Homemade Ramen recipe combines a rich chicken stock with dashi, soy sauce and simple seasonings, then builds each bowl with ramen noodles, sliced chicken, shiitake mushrooms, soft-boiled eggs, baby spinach, green onions, nori, sesame seeds and crispy garlic. It takes time, but most of the work is in preparing the broth and toppings separately.

    Watch how to make Homemade Ramen

    Ingredients

    For the chicken stock

    • 7 cups water
    • 4 chicken wings, or bones and leftovers from deboning the thighs
    • 1 thumb-sized piece fresh ginger (about 20 g), sliced
    • 1 onion
    • 1 garlic clove

    For the dashi

    • 5 cups water
    • 10 g kombu (dried kelp)
    • 25 g katsuobushi (dried bonito flakes)

    For the seasoned broth

    • Chicken stock, prepared above
    • Dashi, prepared above
    • 4 tbsp soy sauce
    • 2 tsp rice vinegar
    • 2 tsp sugar
    • 1–1½ tsp salt, or to taste

    For the noodles and toppings

    • 4 packs ramen noodles, about 150 g (5 oz) each
    • 2 boneless, skin-on chicken thighs
    • 30 g (1 oz) dried shiitake mushrooms
    • 2 eggs
    • 1 small bunch baby spinach
    • 2 green onions, thinly sliced
    • 2 garlic cloves, thinly sliced
    • 1 sheet nori, cut into small squares
    • Sesame seeds, for garnish
    • Kosher salt and freshly ground black pepper, for seasoning the chicken
    • 1 tbsp butter
    • Neutral oil, as needed, for frying the garlic
    • Chili oil, optional, for serving

    Instructions

    Make the chicken stock

    Add the water, chicken wings or bones, ginger, onion, and garlic to a large stockpot.

    Bring to a boil, then reduce the heat and simmer for at least 2 hours, or up to 6 hours if time allows.

    Strain the stock, discard the solids, and set the stock aside.

    The chicken stock can be prepared 1 day ahead and refrigerated until needed.

    Make the dashi

    Combine the water and kombu in a large pot and heat over medium-low heat for 20 to 30 minutes. Do not let the liquid boil.

    Remove the kombu.

    Increase the heat and bring the liquid just to a boil. Add the katsuobushi, let it sink, and simmer for 30 seconds.

    Turn off the heat and let it steep for 10 minutes.

    Strain through a cheesecloth-lined fine strainer, or a fine strainer lined with paper towel, into a large bowl.

    Season the broth

    Return the dashi to the pot over medium heat.

    Add the chicken stock, soy sauce, rice vinegar, sugar, and salt.

    Taste and adjust the salt if needed.

    Keep the broth hot over low heat while you prepare the toppings and noodles.

    Prepare the chicken

    Preheat the oven to 375°F / 190°C.

    Season the chicken thighs generously with kosher salt and freshly ground black pepper.

    Melt the butter in a large oven-safe skillet over medium heat.

    Add the chicken skin-side down and cook for 5 to 7 minutes, until the skin is golden brown and releases easily from the pan.

    Flip and cook for another 4 to 5 minutes.

    Transfer the skillet to the oven and roast for 15 to 20 minutes, or until the chicken is cooked through.

    Transfer the chicken to a plate, cover loosely with foil, and let it rest before slicing thinly.

    Prepare the eggs and mushrooms

    Bring a pot of water to a boil.

    Gently lower in the eggs straight from the refrigerator and simmer for 7 minutes for slightly runny yolks, or 8 minutes for soft but set yolks.

    Transfer the eggs immediately to a bowl of ice water and cool for at least 5 minutes.

    Peel carefully and cut in half lengthwise.

    Meanwhile, place the dried shiitake mushrooms in a bowl and cover with hot water.

    Soak for 20 to 30 minutes, or until softened. Squeeze out the excess water and slice thinly.

    Prepare the spinach and fried garlic

    Wash the baby spinach and set it aside. It only needs to wilt briefly from the heat of the broth when the bowls are assembled.

    Heat a little neutral oil in a small skillet over medium-low heat.

    Add the thinly sliced garlic and cook for 2 to 3 minutes, until golden and lightly crisp.

    Remove the garlic from the oil and set aside.

    Cook the noodles

    Cook the ramen noodles according to the package instructions, usually 1 to 3 minutes depending on their thickness.

    Slightly undercook them so they do not become soggy once the hot broth is added.

    Drain well.

    Assemble and serve

    Divide the noodles among 4 bowls.

    Pour the hot broth over the noodles.

    Top each bowl with sliced chicken, shiitake mushrooms, soft-boiled egg, baby spinach, green onions, fried garlic, nori, and sesame seeds.

    Finish with a little chili oil if desired and serve immediately.

    Recipe Notes

    Make the chicken stock ahead

    The chicken stock can be prepared 1 day in advance and refrigerated until needed. This makes the final ramen much easier to assemble.

    Do not boil the kombu

    Keep the dashi below a boil while the kombu is steeping. Remove the kombu before bringing the liquid up to a boil and adding the katsuobushi.

    Slightly undercook the noodles

    Ramen noodles continue softening once the hot broth is added. Cook them just shy of fully done so they stay springy in the bowl.

    Keep the eggs soft

    For a slightly runny yolk, cook the eggs for about 7 minutes. For a soft but more set center, cook for about 8 minutes, then transfer them immediately to ice water.

    Add the spinach at the end

    Because baby spinach wilts very quickly, there is no need to cook it separately. Add it directly to the bowls and let the hot broth soften it.

    Fry the garlic gently

    Cook the sliced garlic over medium-low heat and watch it closely. It can go from golden to burnt very quickly, and burnt garlic will taste bitter.

    Adjust the broth before serving

    Taste the seasoned broth before assembling the bowls and adjust the salt if needed. The soy sauce already adds saltiness, so make the final adjustment carefully.

    Learn more about Homemade Ramen

    Want to learn more about the dish, its flavors, variations and place in Japanese food culture? Read our guide to Homemade Ramen.